Friday, July 27, 2012

Palmer/Pletsch - Fabric Store Tour


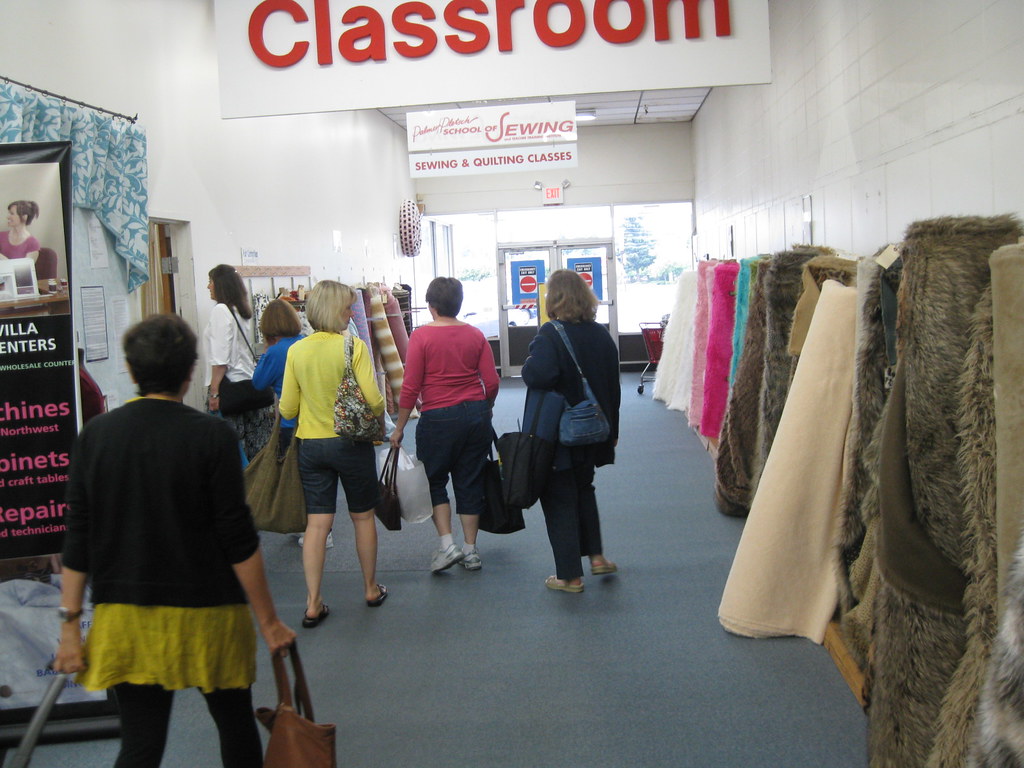
Most of the Fit Workshop participants signed up for the Fabric Shopping Day.  We started early Tuesday morning with our first stop at the Mill End Store.
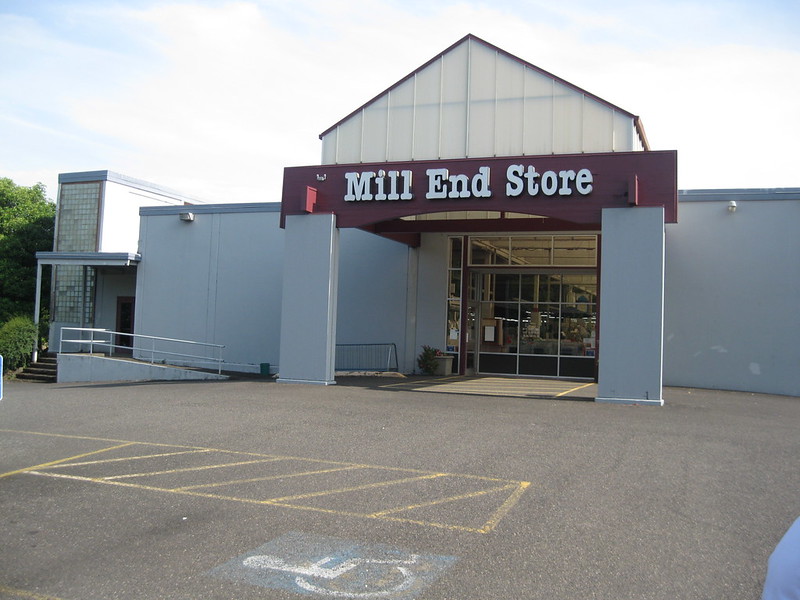

Mill End Store
9701 S.E> McLoughlin Blvd
Milwaukie, OR 97222
(503) 786-1234


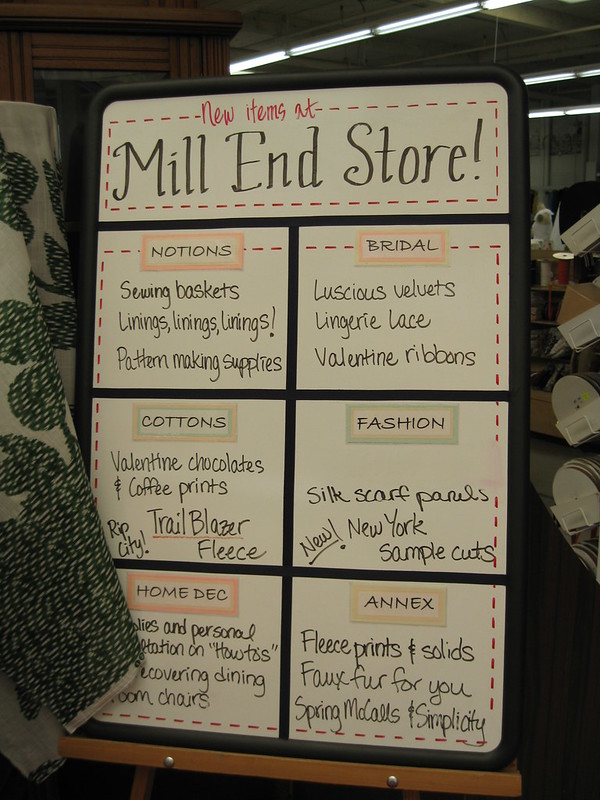
This store is huge and has a wide section of textiles and notions.  Within 20 minutes of my shopping experience, I saw dozens for fabrics I’d like to purchase.  But I forced myself to be reasonable.  I already own enough fabric to keep me sewing for months.  
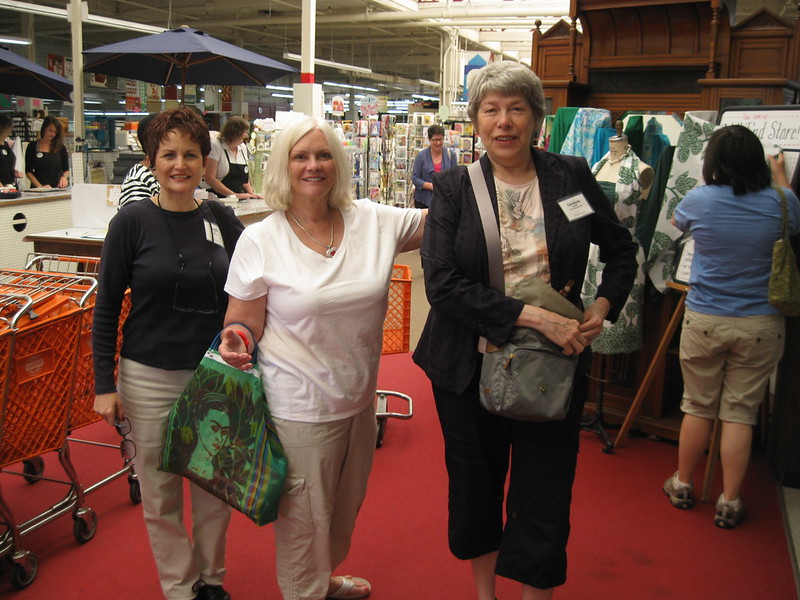
Wendy, Lisa, Carolyne


Anyway, I entered the store with an idea of what I wanted to buy:  find cloth for my Chanel jacket, woolen for slacks, and some pretty brocade for the pleated Vogue dress.  I was able to find two out of the three plus a few extras.  There was even something in the basket for my DD.  (I’m always thinking about her when I shop.)  She could use a few dresses and some slacks for work.

In the end, my haul included several yards of cloth:

Black and Purple wool suiting (3 yds)
Purple silky polyester (2.5 yds)
Fuchsia rayon (3 yds)
Grey wool suiting (4 yds)
Grey, pink, and cream chiffon silk blend (2.5 yds)
Medium brown wool (2.5 yds)
Medium brown, cream, orange tweedy boucle (2.5 yds)
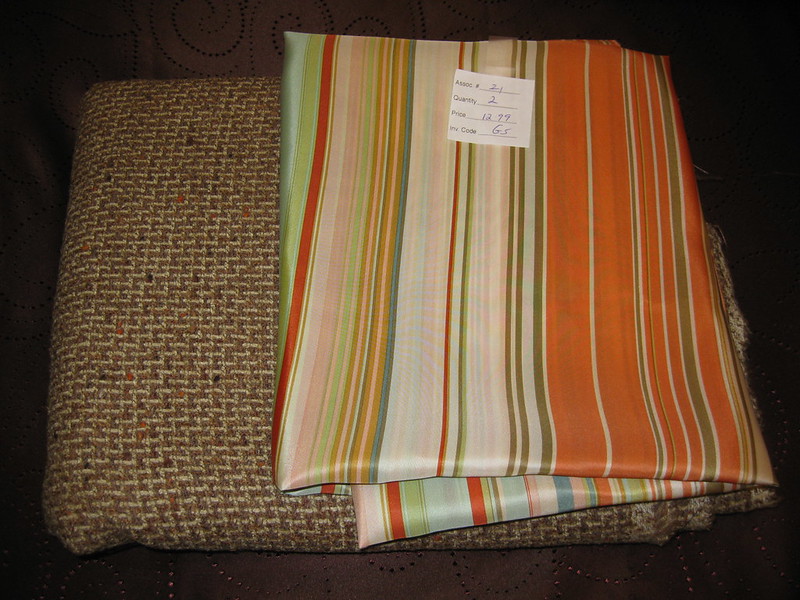
Fabric for Chanel Jacket

Orange, cream, green and brown striped silk (2 yds)

Their prices are similar to other mid-range fabric merchants. (Note:  Palmer/Pletsch tour participants received a 20% discount.)
The sales associates were polite and helpful.   At least two people asked if they could help me find something.  

The quality of the fabric was very good.  I didn’t really see any fabric that was of poor quality.  They did have a remnant section that I didn’t have a chance to visit. 
I would certainly shop at the Mill End Store again.  They have a very large section of fabrics, natural and synthetic, for home dec and fashion sewing.  If you visit Portland, stop by the Mill End Store.
   
More about the Mill End Store can be found on their website:  Mill End Store


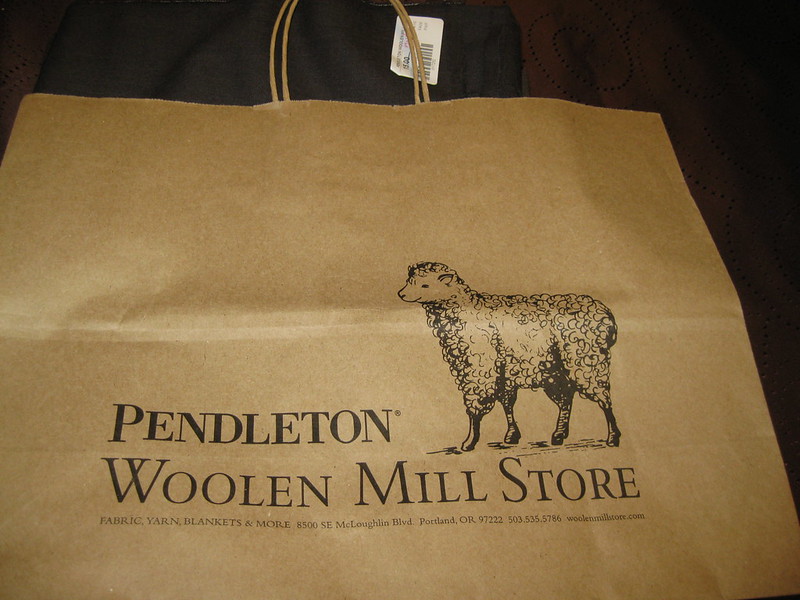
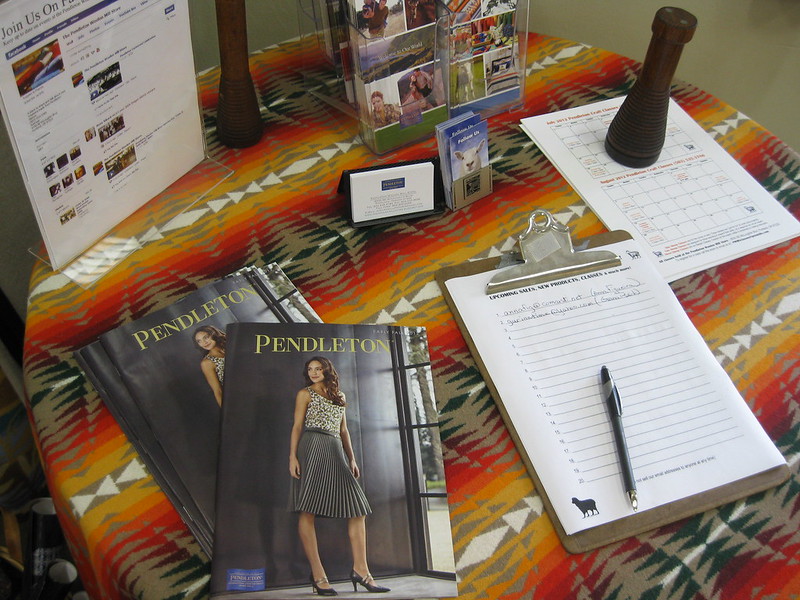
Next Merchant – Pendleton Woolen Mill Store
8500 SE McLoughlin Blvd.
Portland, OR 97222
503-535-5786


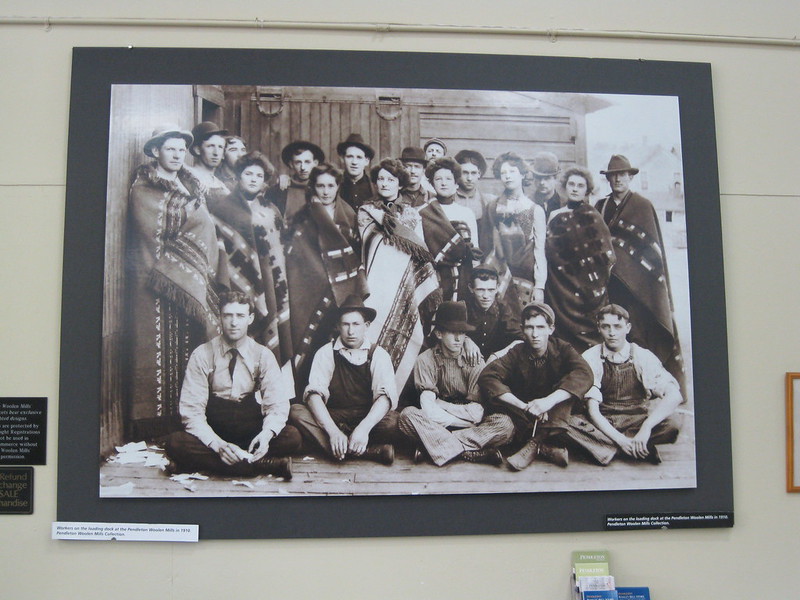
Pendleton Mill Workers
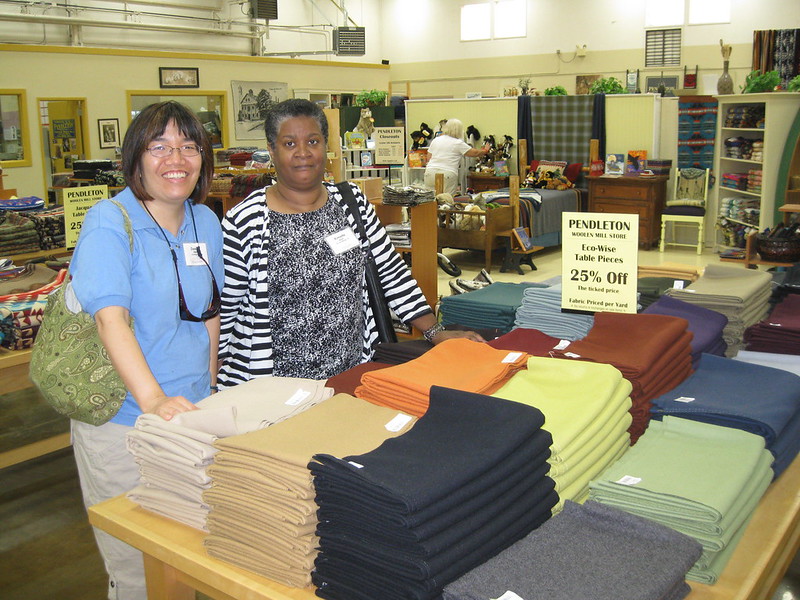
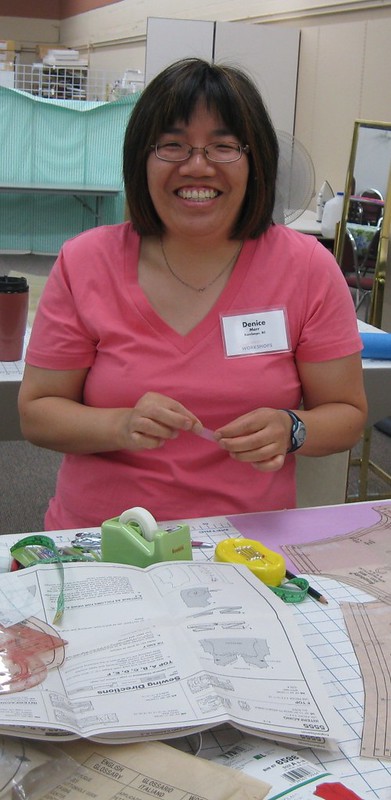
Denice and Kimette

You should put the Pendleton Woolen Mill Store at the top of your “To do list while in Portland”.  Pendleton 
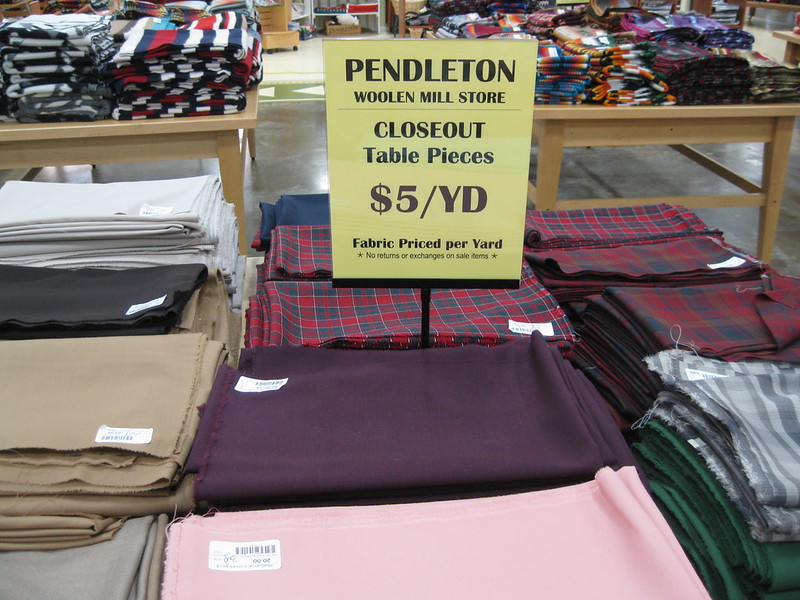
WMS has woolen for a fraction of the cost.  I do mean fraction.  There were several tables loaded with woolens for a 4th, 3rd or half off the original labeled price.  I was able to grab three pieces of woolen, two – two and half yards each, for $5.00 per yard.  I don’t know of any store that can beat that price.  Many of the fabrics on the discount tables were also on rolls.  So you could have a sale associate cut any length as long as it was available.


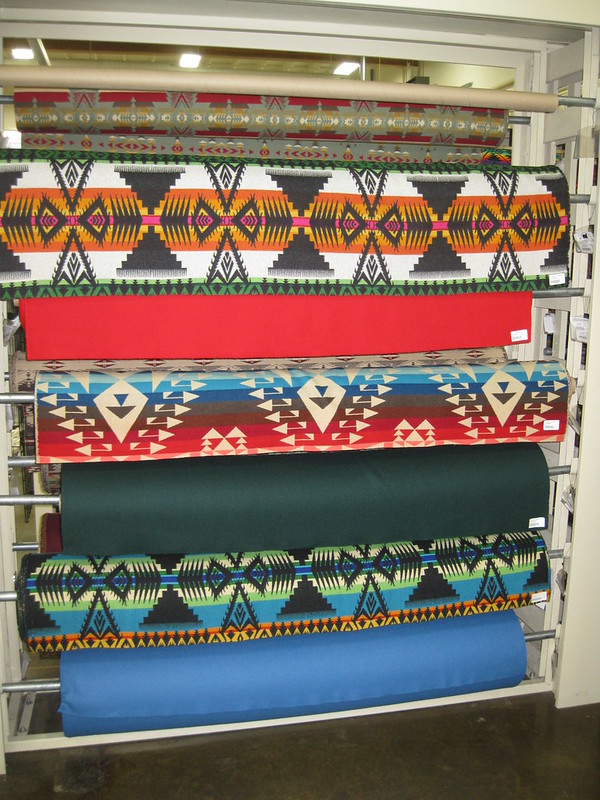
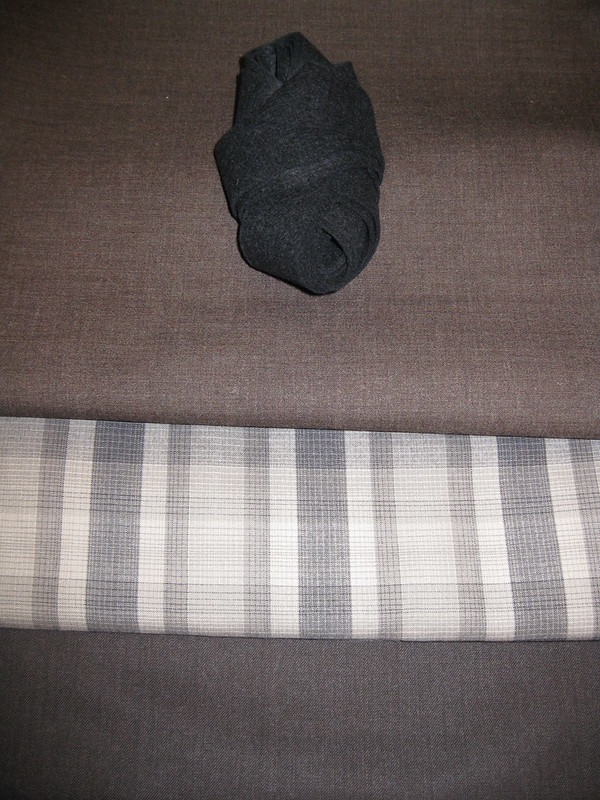
There were interesting displays throughout the store.  Some I liked and thought maybe one day I would try something like that.  In the meantime, I only selected common colors and one plaid. 


The sales associates were polite and friendly.  I also purchased some felt binding in black.  Amy, the funny sales associate, kindly helped a few of us with our purchase of the binding. 

Their fabric selection is limited to woolens, but the quality of their products is outstanding.  I enjoyed my shopping experience and would shop there again.


Josephine Dry Goods
Down Town Portland
521 SW 11th Avenue
Portland, OR 97205
503-224-4202

Josephine was the third store on the fabric shopping tour.   The store is small compared to the Mill End Store.  They sell fine fabrics at competitive prices.  By the time we arrived at Josephine’s, I was in “look” only mode as I had shop enough during this shopping tour.  The sales people were friendly and very helpful. 


My looking experience was good.  I could see myself shopping there again.  Josephine offers sewing classes for all skill levels; they also offer several classes on specific construction techniques.  Take a tour of their website which includes a photo gallery of some of the classes they offer.

Josephine’s has gorgeous displays throughout the store.  Some appear to be student projects.  See gallery of photos on their website for more.

That same afternoon, I was scheduled to have my color analysis done by Ethel Harms.  So I missed the final stop at Button Emporium and Ribbonry, 1016 SW Taylor, 503-228-6372.


Fabric Depot, Inc.
700 SE 122nd
Portland, OR 97233
503-252-6267
800-392-3376

My final store review is on the Fabric Depot, where the Palmer/Pletsch School of Sewing is housed.  The store is huge.  The quality of service, fabric and notions is excellent.  They do have a huge selection of cottons, of all variety.  They also stock silks, rayons, woolens, and various synthetic fibers.  In some ways it reminds me of a Super, super JoAnn’s and Vogue Fabrics rolled into one.  They carry a better quality of fabric (than JoAnn’s) and a better section of notions, books, and crafting goods.  They provide special order and wholesale services as well.

The Palmer/Pletsch students received a 30% discount on all products purchased there.   They stock Palmer/Pletsch books, DVD’s, and notions.  I purchased 
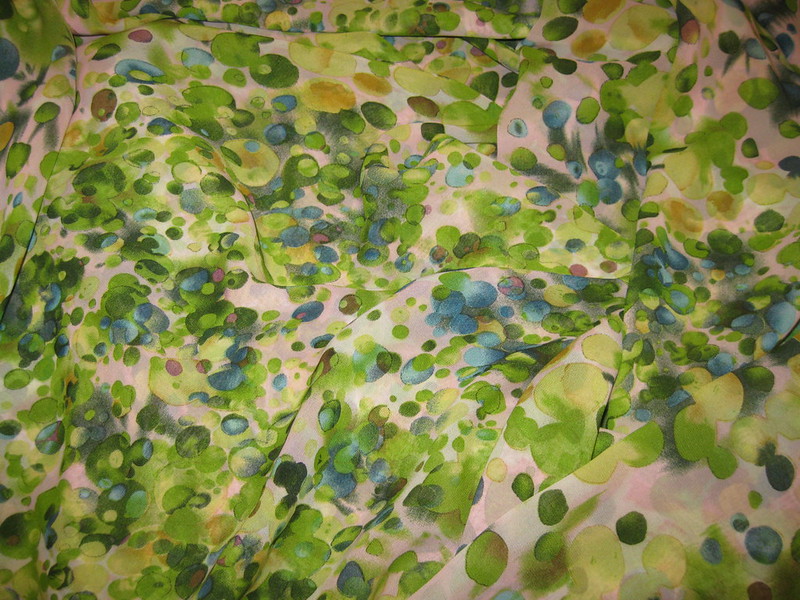
some of the things required for the Fit Workshop.   My purchases also included two fabrics:  stretch sateen print and a chiffon print.


I mentioned notions in the previous post.  These helpful notions were on the class supply list.  You might find them useful as well.  They are: (1) 1/2” scotch brand magic tape.  It works better than the wider variety for pattern alterations.  (2) Magnetic pin holder – I purchased a cling on that attaches to clothing.  Very handy.  (3) 1 3/8” extra fine glass head pins.  They are great for pinning tissue patterns together for fitting.  (4) And finally, Perfect Pattern Paper tissue for alterations and tissue-fitting.


That’s all for now.   Have a great weekend!
C

Wednesday, July 25, 2012

Palmer/Pletsch - Fit Workshop July 2012


FBA on V8804.  It's not hanging perfectly because I'm avoiding the pins at the side.

The Palmer/Pletsch (PP) fit workshop was everything I had hoped for and more.  I purchased my first PP pattern sometime in the 80’s.  Their guide sheet contains additional information about fit and construction.  Over the past 10 years, I purchased about two dozen PP patterns and the “Fit for Real People” book.   The patterns and book have been a tremendous help to me with making fit adjustments.  This class builds on that knowledge.


Each day Pati/Marta brought garments from there private collection to help illustrate several useful points about fit, versatile patterns, design changes, and fabric use.  For example, the first day of class both Marta and Pati wore their rendition of Melissa’s jacket (M6294).  They had added topstitching to the back yoke that emulated the chevron affect that the striped fabric produced in my jacket.
On the first day, we received a lesson on the history of pattern companies to help us understand the evolution of pattern sizing and how the industry has struggled in recent years to maintain a viable customer base.  We also received a lesson on the resurgence of the home sewer.  In recent decades home economics has been removed from many of the high schools in North America.  Today, many twenty and thirty somethings are making their own clothes due to the poor quality of industry manufacturers. 


Each person was taught how to measure themselves before selecting the appropriate pattern size.  This was accomplished using the high bust measurement.  This measurement correlates to the bust measurement indicated on the pattern envelope.  Using this measurement is the best way to select a size to fit your neck and shoulders. We used M2718, which includes a sloper, dress, skirt, and blouse pattern.  The sloper has multiple bodice fronts ranging in cup sizes A to DD.   If you are a DD + use the front bodice for a B cup and make FBA.  This was a great learning experience.  The guide sheet provides excellent instructions on how to use the pattern as well as how the make the adjustments.  BTW-  Each of the big four offer a version of this sloper.  The pattern companies also use this sloper to create all patterns.  
                           Pati and Susan.  Susan brought this jacket for a lesson in fitting.                              
 
I was surprised by some of my fitting adjustments.  I should make a broad shoulder adjustment (back) easing or darting at the shoulder to match front shoulder seam; make deeper seam allowance at side bodice as needed; slightly shorten right side of bodice to match length of torso; shorten front skirt at the waist instead of the bottom to even out the hemline; and initially, I measured for a size 16 (later discovered that a 14 will do in most cases.)  In the past, I would do:  a sway back adjustment, a full bust adjustment, and some length adjustments; some shorten (crotch area), and a prominent shoulder blade adjustment.   The exercise produced slightly different adjustments for me.  Of course, I will test the new adjustments and share the results with you.  I do recommend the exercise especially to new sewers.  It will reveal important information about adjustments needed for other patterns you want to sew from.
New stitching line indicated in red for my skirt pattern.


Another day, they taught the difference between princess seam and a side seam.  It’s a subtle difference, but a difference just the same.   I wasn’t aware that there was a difference.  (More on that as I post my next batch of sewing projects.)

My Fitted Patterns
 
As part of our supply list, we were to bring a few patterns of choice to fit during class.  I chose to bring a group from my collection that were challenging to me.  (S2894, V1192, V1127, and V8727)  These were challenging because I didn’t quite know how to go about making the FBA without a huge dart.   I wanted to keep the same design lines.   These patterns were perfect candidates for rotating the dart or rotating the FBA excess to the gathers or pleats.  All were successfully fitted using the PP FBA techniques.   The Vogue dress V1192 was the most time consuming.  Marta taught me how to rotate the bust dart into the pleats.  Then she taught me how to readjustment the pleats to form the proper drape.  This FBA contained a lot of steps, but it was doable.  Other patterns adjusted during the workshop are:  M6116, M6042, and V8804.  I was pleased to get so many altered during the time of the workshop.
FBA before rotating the dart to the neckline (V8727 Blouse).
Dart rotated to the neckline to be gathered (V8727 Blouse.)
 
I feel I covered a fair amount of details about my experience at the four day workshop. I don’t want to give away the farm.  There were many lessons learned.  My plan is to use the techniques and practices learned in upcoming sewing projects. I want to quickly incorporate my new skills into my sewing.  The fitting exercises may be presented as a tutorial to show more details from point A to point Z.  Meanwhile, there is more to come on fabric stores, notions, color analysis. 

Below are some important and helpful tips/lessons learned about fit and sewing are below:

  • Learn how to select the correct pattern size using the high bust measurement.  It will save you from struggling with neck and shoulder adjustments. 
  • Start the tissue fit process from the back; then work your way around to the front, shoulder and sides.
  • Know the difference between style and wear ease.  Most patterns have the finished garment measurements for the bust, waist, and hip printed on the pattern.  The measurements will be different based on the style of the garment.  Sometimes it’s okay to absorb some of the style ease for small fit issues. But if too much of the style ease is used for wear ease, the design of the garment may become distorted.  So it is best to do the fit adjustment rather than “cheat” by overly using the style ease.
  • Dart manipulation – sometimes you have to make two or three at the bust area instead of one.  Or you may need to change the angle for a more flattering appearance.
  • Absorption of FBA dart by rotating into pleats or gathers.  If you want to maintain the style lines of a garment, you can rotate the excess into the pleats or gathers.  Some adjustments may be required to get the right drape, but it is doable.  Test it.
  • The Palmer/Pletsch fit techniques work with other patterns brands.  These techniques have helped solve some of my fitting issues.  The “Fit for Real People” is a great resource to have in your library.
  • Learn to read the wrinkles.  They point to the area where fit adjustments need to occur.
  • Take a Palmer/Pletsch fit workshop.  It’s worth it.  The books are great, but the hands-on-classroom learning is outstanding.  You will have Pati and Marta to help guide you through the difficult parts.
  • Don’t be afraid to try something new.  Find what works for you.  
  • The proper tools make fitting and sewing easier.  Good reference materials and notions can make a world of difference in your finished garments.
    • While I was in Oregon, I purchased the Full Busted and Fabric DVD’s.  I also purchased “The Business of Teaching Sewing” for the Teacher Certification Workshop (July 18th), Grid Tracing Paper, and “Couture Sewing” book.  Books and other products can be found on the Palmer/Pletsch website if you are interested.
That’s all for today!
Happy Sewing,
C

Tuesday, July 24, 2012

Palmer/Pletsch - Meet and Greet Fit Workshop July 2012


I know many of you are ready to read about the workshop.  But before I get into that I wanted to talk about the welcome and the mood of the atmosphere.  These things are important to demonstrate the professionalism, passion, and proficiency of the Palmer/Pletsch School of Sewing.  Second, I wanted to send a shout out to my fellow classmates.  There were 18 students, with varying skill levels.  Many are Home Economics teachers, some retired and others still working.  Our group included a speech pathologist, college professor, and an IT professional (like me).   You can see that people from many professions enjoy sewing and customizing their wardrobe. 

 
Instructors and Students - 


Pati Palmer was strategically stationed at the door of the classroom with a warm hello, a firm hand shake and welcoming smile on her face.  Marta Alto was all smiles too and graciously greeted everyone as they came through the door.   As we bustled into the room, everyone was cheerful and eager to learn how to tissue fit patterns to make well fitted custom garments.  There were name tags for everyone to help us remember the names of our fellow classmates.

 Marta Alto - Teaching Dart Rotation

The program was well organized and flowed seamlessly from one segment to the next.  The atmosphere and the mood were perfect for learning.  For an ice breaker, each person introduced themselves.  Pati and Marta’s introduction included the telling of extensive training and experience in sewing and teaching.  Combined, they have over 80 years of experience.  The love for the craft was evident from their long history of educating people in sewing and the business of sewing.  You knew this wasn’t just a job/career; it was a sure labor of love.  

 Cat of Cat Larrea Art Quilt
Carolyne
Connie
Denice


Everyone was ready to be taught and ready to be fitted.   There were individual workstations for everyone who signed up for the class.  This element reminded me of the Project Runway workroom. There were pressing stations, as well as stations for cutting, sewing, and eating.  The classroom was equipped to accommodate hands-on learning, lecturers, and construction demonstrations.

Tina
Gloria
Carol

Marnie
Each person found a work space that was comfortable for their height and made that their work space for the duration of the workshop.  I made a few new friends during the workshops.  I’m not able to post everyone picture based on preference or due to not so good photo quality (on my part).  Please meet a few the newly certified fit Palmer/Pletsch members. 
Beth
Michelle of The Farm Stitcher

Wendy
 Helen of Seam Divas


Next up, more details on my four day fit workshop.

Stay tuned and thanks for your visit,
Cennetta


Sunday, July 22, 2012

Palmer Pletsch - Flagship School of Sewing - Portland, Oregon


This is a glimpse of Portland, Oregon.  Lush and green and full of architectural history and beauty like the large cities on the west coast.  It is one of three cities in the contiguous United States with extinct volcanoes (Mt. Hood and Mt. Helen) within its boundaries.  The hillsides are covered with evergreens.  A beautiful sight to see.  It's also known for it's fine cuisine and classical performing arts.


So what does Portland have to do with fabric, sewing, and fitting?  Well it is where the flagship Palmer/Pletsch School of Sewing  is located.  The school is conveniently accessible at the Fabric Depot, which is a fabric collectors dream.  There is a wholesale counter, where people in the business of sewing can make there purchases at a special price.


Why am I telling you all of this?  Palmer/Pletsch is a great reason to visit Portland, Oregon. On July 12th, several other eager sewists and I converged onto Portland, Oregon, to learn how to sew clothes that fit.  Your probably thinking, "You already know how to fit the garments you make."  And that is partially true.  I have dozens of patterns that I don't know (correction didn't know) how to fit.  So I avoided even trying.  Those are the projects you never hear about.    Okay...  back to Fit Workshop.  Our educational journey begin early Friday morning.  The Monarch Shuttle promptly arrived at 9:00am.  We rushed into the classroom, ready to learn how to best fit our handcrafted garments.

Now if you are planning to attend a Palmer/Pletsch workshop, please be advised to come with a clear and positive mind, an acute passion for sewing, a willingness to try new approaches to obtain a perfect fit, and understanding that many construction guidelines are just that, a guide.  No process is etched in stone.  You can make adjustments based on your own fitting needs.

During the four/five day workshop, we learned how to use the markings on the pattern as a guide, test the process, tweak it, and learn from each other.  You bet there were many success stories. We were each others' praise team, acknowledging our success.

So this is the beginning of several posts that will give you a taste of what you can expect when you attend your first fit workshop in Portland, Oregon.

The topics:

Instructors and Students
Fabric Shops
Color Analysis
Tools to Help You Perfect Your Skills
Be A Sewing Teacher
My Fit Experience and Future Garments

Happy Sewing!
C


Friday, July 20, 2012

I'm Back!

Good evening my faithful followers,

I'm back from my very first Palmer/Pletsch Workshop.  It was outstanding.  I learned a lot about fit.  So, stay tuned.  I will share the high lights of my sewing adventure.

Happy Sewing!
C

Thursday, July 12, 2012

Simplicity 2369 in Gorgeous Print


Weekly I have the pleasure of chatting with a few of my sewing, blogging friends.  And weekly we share thoughts on patterns we'd like to try, projects in the queue, and our ever growing fabric stashes. 

During one of those sewing conversational marathons, Andrea told me she was making a dress using Simplicity 2369.  And guess what?  I decided to add it to my list of summer projects as well. 

As usual, Simplicity gives a vague description of this mini wardrobe collection.  So I describe this dress as a mock wrap dress that comes in two lengths or a tunic.  You have the option of three different sleeve variations.  The wide legged pants has an elasticize waist.

The pattern comes in sizes 8 to 24.


My dress looks like view B with the sleeve variation of view C.  After surveying my collection of knit dresses, I realized I don't have many new dresses with sleeves.  So I decided to use the bell sleeve for this dress instead of the cap sleeve.  It can be worn on cooler summer days and well into the fall.  (It sounds strange mentioning fall when summer just began.) 

The instructions presented no difficulties in the construction of the dress.  It only took a few hours after I cut it out.  My only problem stems from using size 16.  I just needed to make my fitting adjusts using size 14.  It's roomier than I like.  So I will take it in before I actually wear it.

My favorite design element is the mock wrap with the tie or buckle.   I think this is a flattering neckline for me.  And it's easy to wear.  I like comfortable work wear.  Often, I spend hours on the road, traveling to one meeting destination to another.  Knit wears well in the car plus no wrinkles. 

This is a beautiful knit purchased from Gorgeous Fabrics.  It sews together with no problem and has a nice hand and drape.  I'm not sure if this fabric is still available.  Ann has several similar knits available that would work well with this pattern.

I made my usual alterations, which are the same as those made for M6163.  Additionally, I had to adjust the width of the faux wrap overlap (lower left side at hip area).  It didn't lay flesh against my hip.  So I had to adjust the width of it by pulling it in at the side.

I may make it in a solid color for the late fall early winter.  We will see how that goes considering the number of dress patterns I own.  And I do recommend it to others.

Cute and comfortable dress that is easy to sew.


Now for the pants.  No design changes.  I only added a few inches to the length of the leg.  The fabric was purchased at JoAnn's.  This was my first pair of "Fancy Pants" made. 

All pictures for these two garments are posted on Flickr..

Happy Sewing!
C

Tuesday, July 10, 2012

Fancy Pants - McCall 6515


This is one of two pairs of "Fancy" pants I've sewn in the past few weeks.  The first pair were made using Simplicity 2369, which I will review along with the dress, view B.

In the spring, I posted five trends for the coming seasons.  One of the trends is "Standout" pants.  Later I decided I liked Rhonda's description better:  "Fancy" pants.

The daring side of me thought, I would make a pair similar to the last pair of pants in Rhonda's post.  My first choice of fabric was a silky polyester big floral print, similar to the print in Rhonda's post.  Then the modest side of me thought, it reminded me, too much, of pajama pants.  So I decided not to take the risk of a total fashion disaster.  So I opt for this lime and white floral cotton sateen from Jo Ann's Fabrics.

I decided to use this McCall's (6515) pattern because it is simple and has clean lines that would work well with a bold print or texture fabric.

Pattern Description:   MISSES' PANTS: Pants have contour waistband, side zipper, narrow hem and width variations. A: boot-legged, carriers and top stitching. B: straight-legged. C: slightly flared. A, B and C: semi-fitted. D: flared, loose-fitting, front/back pleats. Designed for medium weight wovens.


Pattern Sizing: 6 to 22.

Did it look like the photo/drawing on the pattern envelope once you were done sewing with it?  When I went to the McCall's website to copy the description, I noticed they had linked the wrong technical drawing to the pants.  The drawings look like boot or shoe dressings.  Hopefully, they will correct it soon.

Anyway, my pants look like view A on the guide sheet.

Were the instructions easy to follow?  Typical construction for simple pants.  Very easy and no problems understanding them.

What did you particularly like or dislike about the pattern?  I have a few likes and dislikes:

Likes -
 - Simple flat front pants - perfect for a bold print.
 - Contour waistband - much better fit than the flat, straight waistband.
 - Slightly flared pants - Opportunity for creating a better silhouette for my shape.

Dislikes -

 - I hate easing more than an inch across the front.
 - Side zippers on pants aren't my favorite, but I went ahead with this method of installation.

Fabric Used:  (Stretch Woven) Cotton Sateen

Pattern alterations or any design changes you made:


Pattern alterations:
My usual crotch adjustments; shorten and scoop out the center back seam about 5/8" and add that amount to the side seam.
Moved back dart 5/8" toward the side seams.
 -  Made darts instead of easing the full amount of excess on the front.
 - Lengthen pants 2" where indicated on the pattern and added 2"  at the hem.


Design/construction changes:
 -  Installed a lapped zipper.
 -  Made a deeper hem.
 -  Replaced the small hook and eye with larger ones.
 - Attached belt loops to the waist of the pant and then to the top of the waistband before top stitching.


Would you sew it again? Would you recommend it to others?  Yes,  I plan to make one of the other views.

Conclusion:   Nice and easy pattern to sew.

LinkWithin

Blog Widget by LinkWithin